Showing posts with label DIY crafts. Show all posts

Friday, March 1, 2013

PAAS Egg Decorating Kits Coupons


WOW! I totally love this coupon!! Hurry and print this one out before it's gone! Head on over to PAAS's Facebook page, "like" them and print out the coupon!

You can get coupons for $1/2 Egg Decorating Kits and $1.50/3 Egg Decorating Kits.

Thursday, February 14, 2013

Valentine Idea: Have a colorful Valentine's Day!


I totally forgot to post the Valentine's Day gift I made up for Leah to hand out to her class! I got LOADS of free crayons this year at Walmart with overage I had gotten from other coupons during back to school season at Walmart!!

When I saw this super cute idea on Pinterest, I knew I just had to make them for Leah's class!!

You can read about my awesome shopping trip, it was featured on my favorite couponing site Living Rich With Coupons.

Monday, February 11, 2013

DIY: Washable Swiffer Dusters

Last week I went to do a little dusting around the house only to realize that the duster that I had was old and yucky. I went onto Pinterest and found a DIY washable Swiffer Dusters Pattern! I had several scrap pieces of felt in my craft closet so I put them to good use! 


Wednesday, January 30, 2013

DIY: On the go coloring book tote


Every week, I'm shoving a coloring book and crayons into my purse to take to church (along with matchbox cars...). After I made the "on the go matchbox car mat," I decided I wanted to make this one as well! It was fairly easy, although I messed up on some of the stitching and had to rip out about 3 feet worth of stitches, LOL!!

Thanks Hideous! Dreadful! Stinky! for the idea!!

Saturday, January 26, 2013

DIY: Sweetheart candy wall hanging

Leah has been complaining that we don't have nearly enough Valentine's Day decorations, aka we don't have  enough hearts throughout our house right now, LOL!! I had seen a similar DIY project on Pinterest and decided to give it a whirl since it look super easy!!

I went to Micheal's and bought plain wooden hearts, pastel acrylic paints, and pretty ribbon.

I painted each heart a different color like sweetheart candies you find in the stores this time of the year. Then I went on the computer and typed out each of our names in a larger font. Then I carefully cut each letter out then lightly traced  them each on the hearts with a pencil. After that I used a red paint pen (you could also use a red sharpie) to color in each of names.

After that I thought that they needed a little something extra so I took some clear glitter paint and added a coat on top of each of them. Then I used a hot glue gun to attach each of the hearts to the ribbon.

I'm so happy with the way this project turned out and I think Leah is too!!


Thursday, January 24, 2013

DIY: I "Wheelie" Like You Valentine


With Valentine's Day less than 1 month away, I wanted to get a jump start on Leah and Joey's Valentines to hand out to their classes.

My dad went to an auction one day and bought an ENTIRE lot of matchbox cars brand new in the packages and there was many more than my kids will ever play with, LOL!! One of Joey's favorite things to play with is matchbox cars so I saw this as the perfect opportunity for Joey to give some to his classroom friends!

I got a package of Wilton Treat Bags at Walmart then printed off the labels and glued them to red construction paper. If anyone wants to download the labels and make your own, you can get it here.

Thank you to Avoiding the Laundry for the idea!!

Tuesday, January 22, 2013

DIY: On The Go Car Mat

Joey and Aiden LOVE to play with matchbox cars and I always have a few somewhere in my purse. Typically in church I'll give him a few of them to play with during mass but he gets bored after a few minutes. When I saw  a few of the "on the go" car mats on Pinterest, I knew I had to give it a whirl and see what I could come up with myself although I wish I would have made it a little bigger and added a handle to carry it by. I do know I want to make more of these as gifts!


Wednesday, January 16, 2013

Googly eyed monsters

There's nothing better than project to help move a snow day along, LOL!! I had some googly eyes in my craft closet and thought making some monsters was an excellent idea after Joey watched Monsters Inc. last night! 

I just glued the eyes on paper, gave the kiddos markers and let their imaginations go wild (except I had to help Aiden and Joey a little...)!   


(Leah insisted on taking a picture of me, LOL!!)


Sunday, January 6, 2013

More salt dough fun!!

I posted last month my recipe for salt dough and a few of the ornaments I made. I made these as well from Joey, Leah, and Aiden's hand prints. I hope to make this DYI project an annual tradition, this will be the perfect way to watch my kids grow through their hand prints. 


Friday, January 4, 2013

DIY Project: Birthday Board


My husband is the oldest of 7. The majority of his siblings are now married and are having children so our family has been growing very quickly!! It's very hard to keep track of everyone's birthdays and I knew this would be the PERFECT Christmas gift for my mother in law!

My mother in law has 7 children, 3 daughter in laws, 1 son in law, 1 mother in law, 8 (soon to be 9) grandchildren, her mother in law, 4 of her own brothers, 3 sister in laws, 1 brother in law, 2 nieces, 3 nephews, and I'm sure I might have left a few more out, LOL!!

In addition to all the disks I already personalized, I've painted an additional 12 since I know our family will continue to grow for several more years!!

The large board I got at Michael's Craft Store and used one of the 50% off coupons so I got it for $7!! I spray painted the green base coat that way the paint would be nice & smooth. For the letters, rather than going out and buying stencils, I found the perfect font and printed out the letters in 150 font then cut them out and traced them with a black sharpie marker and painted them in black. I also added a coat of black glitter paint on top of the letters so they would "pop" a little.

Then I bought a few bags of little wooden disks similar to these. I painted them then drilled small holes in them. For the lettering I used a black fine tipped Sharpie Marker. Then I added a clear clear of glitter paint to the top to make the disks sparkle a little.

Then I used metal jewelry findings similar to these  to attach the disks to each other.

I am tickled to death how awesome this turned out!!


Thursday, January 3, 2013

DYI project: "home is where the heart is" map


Over the next few days, I'll be posting some DYI projects I've worked on over the past few months. I couldn't post them due to the fact they were all Christmas gifts for family members, LOL!!

This "home is where the heart is" map was the perfect gift for my sister in law, Stephanie. She grew up in a suburb of Chicago, my brother in law grew up here in Connecticut, and now they live in a suburb of Washington, DC. So, I wanted her to have a reminder of all three of their hometowns.

I'm totally happy with how this one turned out!!

Sunday, December 16, 2012

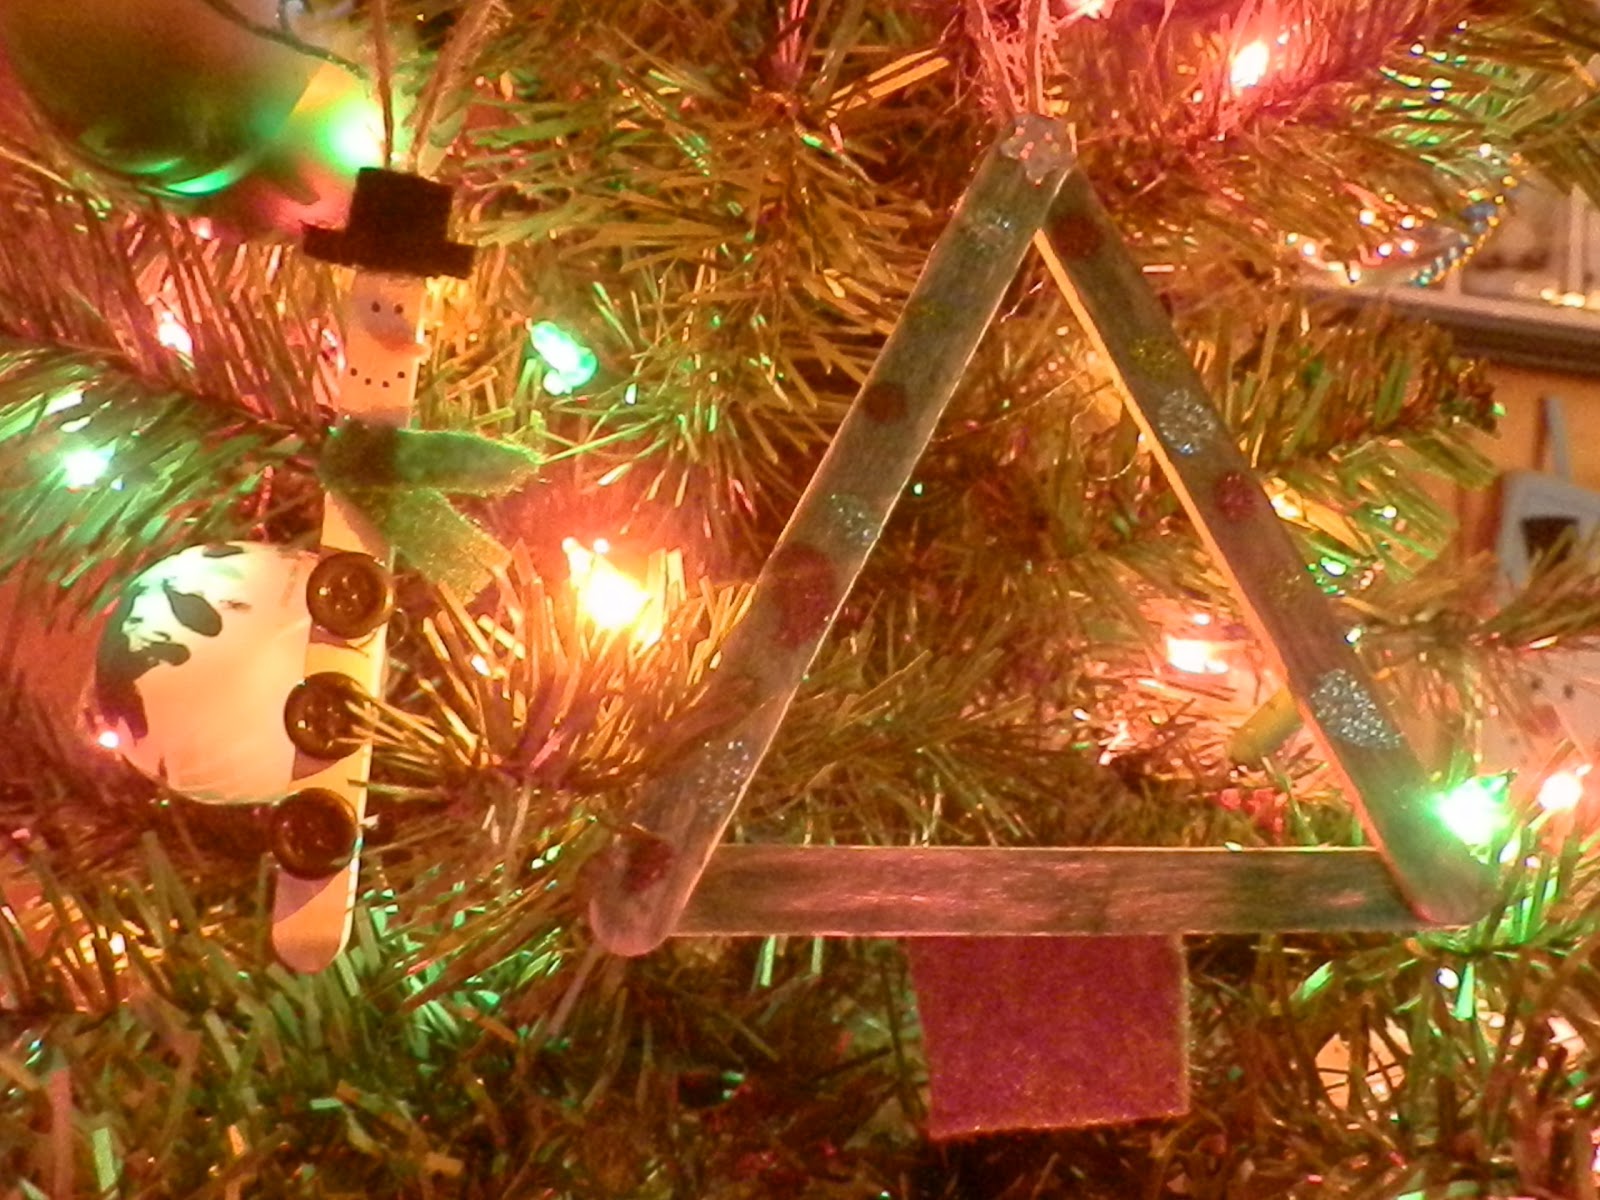
Popsicle Stick Ornaments

Leah wanted to make Christmas ornaments with me the other day so I thought for a few minutes then rememberer I have a bunch of Popsicle sticks in my DIY stash in our basement. Even mommies can still make a craft project out of a popsicle stick, LOL!

With the help of green markers, glitter glue, a star sticker and brown felt, Leah made her Christmas tree.


With a little white paint, buttons, an extra fine black sharpie marker, and green, orange and black felt, I made the snowman.

I'm very happy and tickled with the final products of both, super cute and great additions to our Christmas tree!!


Wednesday, November 28, 2012

How to remove labels from glass bottles/ containers

Thanks to my love of up-cycling things around our house to make new projects from, one of the things that I've become an old pro at how is removing labels and gooey stuff  from glass bottles or any other glass container.

The first tip is DON'T get the label wet!!! Peel as much of it off as you can, then take a straight razor and scrap off the rest of it that you're able to.

While doing peeling and scrapping off the label, boil some water. Once the water is boiling, carefully and slowing using a funnel, pour the water via the funnel into the container you want the label off of. Just a quick heads up, pour the water VERY slowly into the funnel, the boiling water will pop up and hit you if you're not careful!!! 

Let it sit for 10-15 minutes. Using potholders, carefully pour the water out of the bottles. Still holding the bottles with the potholder, pour some fingernail polish remover onto a paper towel. Wipe the bottle down until all the sticky goo is gone. Sometimes there might be a little sticky stuff left on the bottle, take the straight razor, scrap as much off again as you can, then wipe again with the nail polish remover. You may have to do this a few times...

The end result is a nice clean bottle or any other glass container with no more label. 


Salt Dough Christmas Ornaments


I had seen several pins on Pinterest on Salt Dough Ornaments. They looked super easy and like a lot of fun so I thought I would give them a try!

Ingredients
1 cup of salt
2 cups of flour
1 cup of water

Mix all 3 ingredients together until mixed very well until a dough is formed. Then use a rolling pin to roll out dough to your desired thickness. Then you can use cookie cutters to make the ornaments or you can use a knife or toothpick to cut out your desired shape you want.

*Depending on where you are making the ornaments, you might want to lay some wax paper down on the surface you're using. You'll want to sprinkle a little extra flour down before you start working with the dough otherwise it will stick. I also made sure some there was a little flour on my hands and rolling pin as well.

We made a few different types of ornaments:

For each of our children, I had them press their hands into the dough and made hand print ornaments for each of them. (which I still have yet to paint, LOL!)

I also made snowmen, I cut out circles then a little carrot nose. Then I painted it. I also added a coat of clear glitter paint to give it a little added shimmer.


If you would like, you can add a little food coloring to the dough as well, but a heads up, you might want to wear gloves! When I added red dye to make the Santa ornament, I ended up with red hands, LOL!!

The Santa took a while for me to make, I found the idea from The Glue Gun Girl. I rolled out each little piece of his beard by hand. It took a tad bit longer than I thought, LOL! After it was done in the oven, after I let him sit for a day or so, I sprayed a clear coat sealer on it.


I also made Christmas tree ornaments as well but still haven't painted those yet either, LOL!

I put a hair bobby pin into each of the ornaments to use so I could add an ornament hook to. Some people just poke a hole through their ornaments but I liked the idea of the bobby pin.

After all the ornaments were done, I put them in the oven at 200 degrees for 2 hours. After 2 hours still felt a little soft so I popped them back in a for a while longer. Then I left them out over night on the cookie sheet to air dry. The next day a few of them still felt a little damp so I popped them back in the oven the next day for another hour.


Recycled Light Bulb Ornaments

Again, another type of ornament I had seen examples of around on Pinterest but gave them my own little flare.

These little guys were so fun to make! I'm tickled to death to finally have something to use old light bulbs to make!! I love up-cycling things from around the house!!

To use as a hanger for both of the bulbs, I used brown twine and tied it around the top of the ornament then tied the two ends together in cute bows.

For the Snowman Light Bulb, I painted the bulb white, sprinkled white glitter all over it, waited for that to dry. Then I did a few coats of the homemade modge podge I made the other day. I found super cute black rhinestone stickers at the craft store for the eyes, mouth & buttons. For the nose, I used orange puffy paint.


For the Penguin Light Bulb, I did the first coat of paint in white, then used a pencil to outline the area I wanted to keep white then painted the rest of it black. After both coats dried, then I added a coat of clear glitter paint all over the bulb. After that dried then I used blue puffy paint for the eyes and orange again for the nose.


Tuesday, November 27, 2012

DIY Modge Podge

When I was at Michael's last week, I wanted to pick up some Modge Podge to use on a few of the projects I've been wanting to make lately. When I saw the price, I refused to buy it. Mostly because it's so close to Christmas and I'll be needing to use all the extra money I can to buy gifts for everyone.

I started searching on Pinterest (yet again, LOL!) and came across several different recipes for DIY Modge Podge. This one from Do It Yourself Divas and it works GREAT!! The recipe calls for equal parts school glue and water! And since I got LOADS of school glue thanks to an awesome sale and coupons for free, I just had to try it out!!


LOVE Wall Hanging

Growing up, one of my favorite things to search through was an old container of buttons that my mom and I collected through the years. One trip home to Ohio, while at my mom's I found the container of buttons and started rummaging through it and gathered a large Ziploc bag full to bring back to Connecticut with me.

Once I got home, I put the bag of buttons with the rest of my craft supplies and forgot about it for a few weeks. One afternoon on Pinterest, I saw this super cute wall hanging and then knew the PERFECT buttons to use to make this!

I wrapped 4 approximately 5x7 pieces of wood with fabric from my favorite fabric store I picked up during my trip to Ohio. I the fabric to the wood with a hot glue gun then used a stronger craft glue to glue all the food together. The I nailed a sawtooth hanger on the back.

I glued the buttons onto the fabric with the hot glue gun (watch out with the super small buttons, LOL!)

This is my version, it hangs above our bed, a daily reminder to me the love I have for my entire family :)