Showing posts with label Christmas. Show all posts

Sunday, January 6, 2013

More salt dough fun!!

I posted last month my recipe for salt dough and a few of the ornaments I made. I made these as well from Joey, Leah, and Aiden's hand prints. I hope to make this DYI project an annual tradition, this will be the perfect way to watch my kids grow through their hand prints. 


Saturday, January 5, 2013

DYI Christmas Present: "For your mistletoes"


Even though Christmas has come and gone but I wanted to share this one as well. As many of you know, I LOVE my couponing and I get a lot of stuff for free including free nail polish I scored a few months ago. Seeing that I have one sister and eight sister in laws, I'm always looking for super cute things to add to their Christmas gifts!

And I couldn't pass up the opportunity to add the "for your mistletoes" tag to the polish!!

Thursday, January 3, 2013

Happy New Year!

I hope you all had a very Merry Christmas and a Happy New Year. I decided to take a little time away from blogging due to how busy things got right before Christmas. I went non stop the week before Christmas getting everything ready for the big day, and getting prepared for our trip back to Ohio to visit with my family, not to mention all 3 of our kids had awful colds just in time for Christmas day, LOL!! I'll post a little about our trip to Ohio later in the week.


DYI project: "home is where the heart is" map


Over the next few days, I'll be posting some DYI projects I've worked on over the past few months. I couldn't post them due to the fact they were all Christmas gifts for family members, LOL!!

This "home is where the heart is" map was the perfect gift for my sister in law, Stephanie. She grew up in a suburb of Chicago, my brother in law grew up here in Connecticut, and now they live in a suburb of Washington, DC. So, I wanted her to have a reminder of all three of their hometowns.

I'm totally happy with how this one turned out!!

Wednesday, December 19, 2012

Gingerbread House Fun 2012

Sunday evening the kids and I went over to my in-law's house to make gingerbread houses with my sister in laws. This has become an annual tradition for Leah to decorate them with her aunties and I joined in on the fun this year. It was so much fun minus my house temporarily collapsing and having to rebuild it, LOL!

"Gingerbread has an incredibly long history as a foodstuff, and we know it has been shaped into Christmas tree ornaments since at least the Victorian era. As for gingerbread houses, they became popular after the Brothers Grimm published Hansel and Gretel, though it's unclear whether the edible edifices got their start as a literary invention. In parts of Europe in the 17th century, only professional gingerbread makers were allowed to bake the stuff year-round. That restriction was lifted during Christmas and Easter, which may explain the Christmas-gingerbread connection." via About.com


"When you look at your life, the greatest happinesses are family happinesses."
 ~Joyce Brothers

Sunday, December 16, 2012

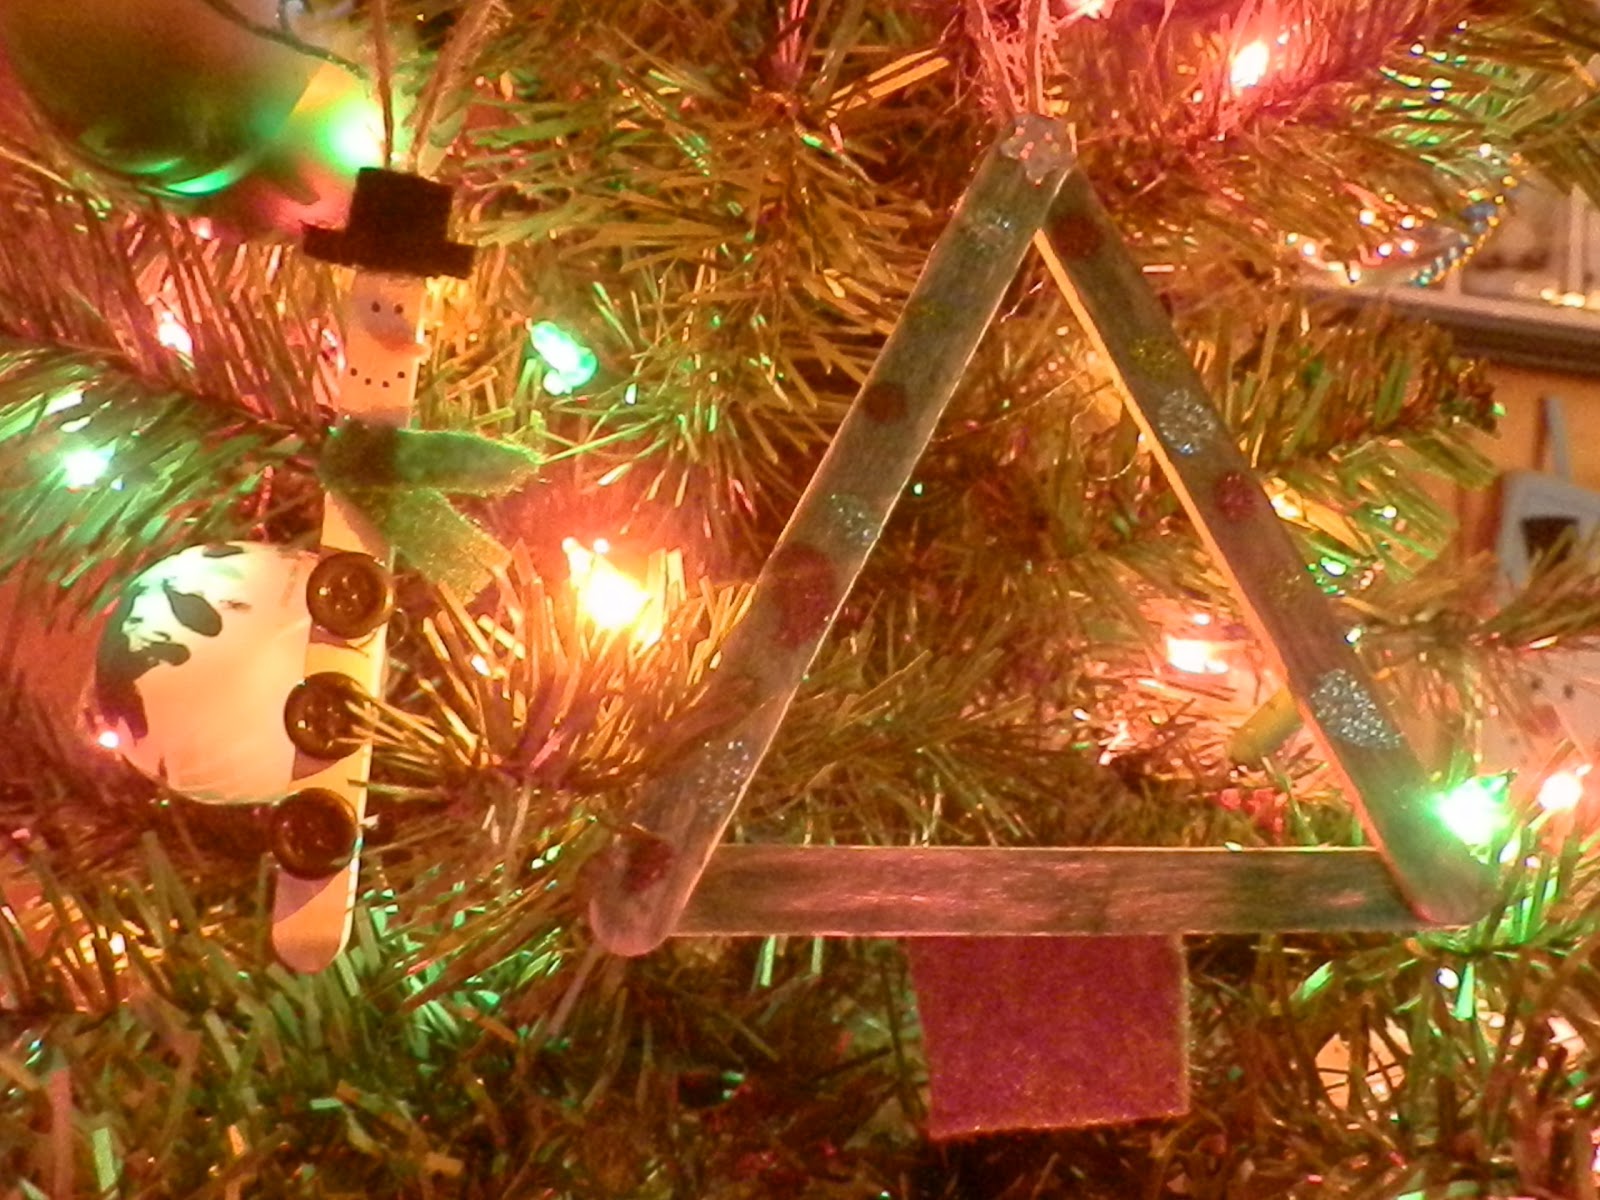
Popsicle Stick Ornaments

Leah wanted to make Christmas ornaments with me the other day so I thought for a few minutes then rememberer I have a bunch of Popsicle sticks in my DIY stash in our basement. Even mommies can still make a craft project out of a popsicle stick, LOL!

With the help of green markers, glitter glue, a star sticker and brown felt, Leah made her Christmas tree.


With a little white paint, buttons, an extra fine black sharpie marker, and green, orange and black felt, I made the snowman.

I'm very happy and tickled with the final products of both, super cute and great additions to our Christmas tree!!


Thursday, December 13, 2012

This year's Christmas cookie tins

Every year for the past 7 years, I've made homemade cookies and candy to give out to my husband's co-workers. Every year growing up, my mom made holiday goodies for my dad's work, along with my brother's work, and several of our friends & family. This was something I've always wanted to continue doing even after I got married and moved out on my own. I love the idea of spreading the joy of Christmas in an extra yummy way! 

This year was tough figuring out what all I wanted to include in the tins. I wanted to make a few new things rather than the same stuff I make every year. I always make fudge, spritz cookies, and cutout sugar cookies along with a few others but added in the rest I ended up making:


The end result, it was so much fun making everything. The only thing I won't make again next year in the candy canes. I enjoy baking so much, the past week has been a blast for me!!

Snickerdoodles, Pinwheels & Pecan Sandies, OH MY!!

I was on a massive baking roll over the weekend in preparation for the cookie tins I take to my husband's office every year! I totally forgot to take pictures while I was making all the cookies, but did get a quick pic afterwards of all 3, LOL!! 

\


Snickerdoodles

  • 1/2 cup butter, softened
  • 1 cup sugar
  • 1/2 teaspoon baking soda
  • 1/4 teaspoon cream of tarter
  • 1 egg
  • 1/2 teaspoon vanilla
  • 1 1/2 cups all-purpose flour
  • 2 tablespoons sugar
  • 1 teaspoon cinnamon
  1. In a medium mixing bowl beat butter with an electric mixer for 30 seconds. Add the 1 cup of sugar, baking soda, and cream of tarter. Beat until combined, scraping sides of bowl occasionally. Beat in egg and vanilla until combined. Beat in flour. Cover and chill about 1 hour or until easy to handle. 
  2. Combine the 2 tablespoons of sugar and 1 teaspoon of cinnamon in a small bowl. Shape dough into 1 inch balls. Roll balls in sugar-cinnamon mix until coated. Place balls 2 inches apart onto an ungreased cookie sheet. Bake in a 375 degree oven for 10-11 minutes or until edges are golden. Transfer to wire rake to cool.
~~~~~~~~~~~~~~~~~~~~~~~~~~~~~~~~~~~~~~~

Cranberry Pinwheels
  • 1 cup cranberries
  • 1 cup pecans
  • 1/4 cup packed brown sugar
  • 2 cup butter, softened
  • 1 1/2 cups granulated sugar
  • 1/2 teaspoon baking powder
  • 1/2 teaspoon salt
  • 2 eggs
  • 3 cups all-purpose flour
  1. For filling, in a blender/ food processor bowl, combine cranberries, pecans and brown sugar. Cover & blend/process until they're finely chopped. Set aside.
  2. In a large mixing bowl beat butter with an electric mixer of 30 seconds. Add granulated sugar, baking powder, and salt. Beat until well combined, scraping sides of bowl occasionally. Beat in eggs until combined. Then beat in as much of the flour as you can with the mixer, stir in any remaining flour. Divide dough in half. Cover and chill about 1 hour or until easy to handle. 
  3. Roll half of dough between 2 pieces of wax paper into a 10 inch square. Spread half the filling over dough square to within 1/2 inch of edges. Roll up dough into log. Moisten edges; pinch to seal. Wrap in plastic wrap. Repeat with remaining dough and filling. Chill for 4 to 24 hours.
  4. Cut rolls into 1/4 inch slices. Please slices 2 inches on an ungreased cookie sheet. Bake in a 375 degree oven for 8-10 minutes or until edges are lightly browned. Cook on cookie sheet for 1-2 minutes then transfer to wire rack and let cool.
~~~~~~~~~~~~~~~~~~~~~~~~~~~~~~~~~~~~~~~

Gluten Free Pecan Sandies
  • 1 cup butter, softened
  • 1/2 sifted powdered sugar
  • 1 tablespoon water
  • 1 teaspoon vanilla
  • 1 cup tapioca flour**
  • 1 cup rice flour **
  • 1 1/2 cups finely chopped pecans
  • 1 cup sifted powdered sugar
  1. Beat butter with an electric mixer on medium speed for 30 seconds. Add the 1/2 cup powdered sugar. Beat until combined, scraping bowl. Beat in water and vanilla. Beat in as much of the flours that you can, stir in rest. Beat or stir in pecans (I beat mine in).
  2. Shape dough into 1 inch balls. Place 1 inch apart on an ungreased cookie sheet. Bake in a 350 degree oven for 10-12 minutes or until edges are lightly browned. Transfer to wire rack; let cool. Gently shake cooled cookies in a plastic bag with the 1 cup powered sugar. (I actually use a salt shaker with powered sugar, since mine are so flaky with the rice flour in them, they tend to fall apart when I've tried to shake them in a bag)
**You can use 2 cups of all-purpose flour rather than gluten free flour if  you'd like. I've made these both ways. 

Wednesday, December 12, 2012

Tips for an easier Christmas with your child with special needs


After I posted about our visit to Santa, I thought I would share a few resources I've found to help fellow families that have children with Down syndrome, Autism or even a Sensory Processing Disorder around Christmas.

Joey gets over stimulated VERY easily, especially in situations/ events that don't happen on a daily basis. I'm talking total meltdowns or just going to hid in a corner/ another room away from everyone else.

I do want to start by saying that Joey LOVES seeing Santa on TV (obviously not in person) and watching children's programs on TV about Christmas and he LOVES our Christmas tree!!!

The past few years we've barely gotten him to open up a wrapped gift, he just can't handle it. It's very upsetting at times seeing Leah and Aiden opening up gifts on Christmas morning and Joey wanting no part of it. This year, I've decided to try gift bags with his gifts rather than wrapping them to see if that makes a difference.

It's so difficult that he won't sit at the table to eat a meal during any holiday or event at my in-laws house. I just want to see him participate with our entire family but I know it's too much for him. I just hold onto the hope that someday he will participate in the festivities rather than hanging out in the family room watching Mickey Mouse Clubhouse on TV while we all eat.

Needless to say, I'm desperate to find new ideas of things to try during this holiday season with him! I've been surfing the web reading other parents experiences and any advice that they might have to share. I wanted to share my findings with anyone who may possibly be in the same boat as us. Here are some of the articles/ blog posts I've found that may also help you out:


As I find more articles and blog posts, I will post them. 

Homemade Candy Canes

Beside chocolate candy recipes, this is the first candy recipe I've ever made. This recipe came courtesy of Whirly Bird. They were definetly A LOT of work to make and I couldn't get them to roll out very well, so I ended up with flat candy canes, LOL!). I also tried to swirl two colors together but I just couldn't get it to work. It was also a lot of work to clean up afterwards, I'm not sure if I'll ever make these again but it was fun to at least make them once :)

  • 3 cups sugar
  • 1 teaspoon Peppermint flavoring (or whatever flavor you have on hand. I used 1/2 teaspoon vanilla and 1/2 teaspoon orange extract. Made a creamsicle-like flavor)
  • 1/2 cup water
  • 3/4 cup light corn syrup
  • 3/4 teaspoon food coloring
  • 1/4 teaspoon cream of tartar
  • powdered sugar, for dusting
  • vegetable oil, for greasing pans and utensils


*You'll need a candy thermometer, latex gloves and a pair of tight-fitting knit gloves.

*Make sure you have read the instructions before you start. Also, set out all your ingredients, measured out and ready to go. You'll want to move fast!

*Preheat your oven to 350 degrees before you start. If the candy starts to cool while you are forming the canes, it will break easily. No problem, just set your candy in the warm oven for a couple of minutes and it will become pliable again.
  1. Combine sugar, water, syrup, and cream of tartar. Heat until the sugar is dissolved very fine (medium heat).
  2. Bring to boil, but don't stir until it reaches 280 F.
  3. Pour globs of mixture onto oiled sheet pans - you want a separate glob/pan for each stripe color. We made white the prominent color, so it was the larger portion.
  4. Drip 1/2 tsp of flavoring on each pile and add the coloring to the non-white portions.
  5. Put on your knit gloves and layer the latex gloves over them. The candy is hot and you don't want to burn yourself! Tight fitting knit gloves work best because your fingers have more freedom to move and work.
  6. With an oiled Teflon or silicon spatula, gently lift the edges of the candy, folding it over itself a few times. Scrape it off the pan, and start working it with your hands. Like taffy, you stretch and pull and form it into ropes. The more you work it the lighter the color becomes, so if you are making white, you will have to work a little longer on the uncolored portion until it turns from yellow to white. However, if you are working on a colored section, don't pull it too much or the color will fade.
  7. After you have formed 8" ropes of each desired color, it is time to form a log. Set the main color (in our case white, the largest section) on an oiled surface. Press the remaining colors onto each side of the log. When you press and rub the ropes with your hands, they should melt into one smooth log.
  8. Working on one end, gently pull the candy outward, twisting to form the striped candy cane pattern. This part is a little tricky and takes a bit of hand strength. It's like you are jerking off an enormous candy dick, actually. Crass! I'm so crass! I'm sorry. But seriously.
  9. When you have pulled a section of your desired thickness, cut the rope and shape into a cane. Set aside on a surface dusted with powdered sugar to keep the canes from sticking. Repeat this process until you run out of candy.
  10. Allow your candy canes to set out overnight to cure before eating them. Otherwise, they will stick to your teeth.
*If your candy gets too cool at any time during this process, set it in the oven for a moment and it will become easier to work with.


Sugar Cutout Cookies with Buttercream Icing

Another one of my favorite things to goodies to make during the Christmas season is cutout cookies. So over the weekend, I made a batch of Christmas tree cookies with buttercream Icing.

In the past I've always cheated and bought decorating icing at the store but this year, I wanted to change it up a bit. I received a Wilton cake/ cookie decorating kit a few years ago for Christmas and never used it until now. I found a fairly simple buttercream icing recipe and gave it a try! It was so easy and takes AWESOME! I used the star icing attachment when I iced them and I think they turned out super cute!!


Sugar Cookie Cutouts

  • 2/3 cup butter, softened
  • 3/4 cup granulated sugar
  • 1 teaspoon baking powder
  • 1/4 teaspoon salt
  • 1 egg
  • 1 tablespoon milk
  • 1 teaspoon vanilla
  • 2 cups all-purpose flour
  1. In a large mixing bowl beat butter with an electric mixer for 30 seconds. Add granulated sugar, baking powder, and salt. Beat until well combined, scraping sides of bowl occasionally. Beat in egg, milk, and vanilla until combined. Beat in as much of flour as possible, stir in the remaining if needed. Divide dough in half and chill for 30  minutes or until easy to handle. 
  2. On a lightly floured surface, roll half the dough until 1/8 inch thick. Using cookie cutters, cut into desired shapes. Place 1 inch apart on ungreased cookie sheet. 
  3. Bake in a 375 degree oven for 7-8 minutes until edges are firm and bottoms are slightly brown. Transfer to wire rack to let cool.
* Recipe courtesy of Better Homes and Gardens Cook Book

~~~~~~~~~~~~~~~~~~~~~~~~~~~~~~~~~~~~~~~~~~~~~~~

Buttercream Icing
  • 1/2 cup solid vegetable shortening
  • 1/2 cup butter
  • 1 teaspoon vanilla
  • 4 cups (1 lb.) sifted confectioner's sugar
  • 2 tablespoons milk
  1. In a large mixing bowl, cream butter and shortening with electric mixer. Add vanilla. Gradually add sugar, one cup at a time, beating well on medium speed. Scrape sides and bottom of bowl often.  When all the sugar has been mixed up, icing will appear dry. Add milk and beat on high speed until light and fluffy. Add food coloring of choice if you want. 
*recipe courtesy of Wilton


Visiting Santa

I couldn't decided whether or not to take Joey with us to see Santa due to all of his sensory problems and the chance of getting over stimulated. I didn't even attempt last year mostly due to the fact he had major intestinal surgery less than 1 month before and I didn't want to expose him to all the germs that might be on Santa from all the other children. The year before that was a nightmare but I was hoping 2 years later things might be different. This year, I wanted to give it a try....

We get to the mall about 7:15 and there was a jazz band playing. The noise instantly freaked him out but I knew that it would be the only chance mostly due to the fact I knew I wouldn't have the energy to get all three kids dressed and to the mall again before Christmas. Not to mention, we coordinated with my sister in law to meet us there.

It finally becomes our turn to go see Santa, the second Joey laid eyes on him, it was a total meltdown... Santa was totally awesome, he invited my husband and I to join in on the fun. Aiden jumped right up onto his lap. Leah was a little shy, so my husband held her on his lap. As for Joey, I held him and hoped for the best, LOL!!

The end result was this...

Thursday, December 6, 2012

Buckeyes, aka Chocolate Peanut Butter Balls


Growing up in Ohio (the Buckeye State), one of the favorite chocolate treats are Buckeyes. Typically only Ohioans (or people in surrounding states) know them by that name. I've mentioned eating Buckeyes to people up here in Connecticut and no one knew what I was talking about, LOL! 

I decided the other day that I wanted to try making them myself for the first time. I thought Buckeyes would be the perfect addition to add to the goodie boxes I'm making for my husband's co-workers! 

I found a few different recipes online but couldn't pick out which one to use, so I compared a few of the recipes & changed a few things around and came up with my own recipe! Truthfully I was pretty apprehensive that they would turn out but to my surprise, they did!! And by my side while I was making them, my sous chief, Leah! 

If you want to give this recipe a try, just be sure you have a few hours to make it!! 

Ingredients
  • 3/4 cup peanut butter
  • 1 cup softened butter
  • 1/4 teaspoon vanilla
  • 3 cups powdered sugar
  • 1 package(8 squares) Bakers chocolate
Directions 
  1. Combine everything but the Bakers Chocolate in a mixing bowl with a spatula. It makes a minute or two for all the ingredients to be mixed completely together. Once mixed together, put the bowl in the fridge until the mixture until it starts to become firm. 
  2. Roll mixture into approximately 3/4 inch balls and stick a toothpick into the top of each ball. Sit them on a cookie sheet with wax paper on top. If the mixture is sticking to your hands, you will want to put it back in the fridge for a bit. I actually had to put the cookie sheet back into the fridge every once in a while to firm them back up a few times while rolling out all the PB balls. 
  3. Once all the PB balls are rolled, put the cookie sheets into the fridge. And leave them there for at least 30 minutes.
  4. In a double boiler, melt the Bakers Chocolate (I actually use a glass bowl sitting on top of a sauce pan with a little boiling water in the sauce pan and the chocolate in the glass bowl). Swill the toothpick back & forth a few times to get some of the access chocolate off of them. If the PB balls start to slip off the toothpick, you'll need to put them back in the fridge again.
  5. Once the chocolate is completely melted, dip the PB balls into the chocolate except for the very top, that way the ball resembles a buckeye nut. Place back on the cookie sheet. After a while, the balls may start to soften back up, so you'll need to place the cookie sheet back in the fridge until the firm back up again. 
  6. After you have dipped all the PB balls into the chocolate, you'll want to place the cookie sheets back into the fridge until they're firmed up (again, LOL!) and the chocolate it completely hardened. Then you can remove the toothpicks from each Buckeye and take your finger and gently cover up the hole. 


PS, go Buckeyes!!! O-H-I-O!!! 


Wednesday, December 5, 2012

One of my favorites, Spritz Cookies!

Another one of the tasty desserts I used to make with my mother as a child was Spritz Cookies using a cookie press. Just like with the fudge, I decided to let Leah in on the fun this year! This week, I'll be a handful of goodies for my husband to take into his office to give to his co-workers.

Ingredients

  • 1 1/2 cups butter, softened
  • 1 cup granulated sugar
  • 1 teaspoon baking powder
  • 1 egg
  • 1 teaspoon vanilla
  • 3 1/2 cups all-purpose flour
  1. In a large mixing bowl beat butter with electric mixer on medium to high speed for 30 seconds. Add granulated sugar and baking powder. Beat until combined, scraping sides of bowl occasionally. Beat in egg, vanilla. Then beat in as much of the flour as you can with the mixture then stir in the rest (although I'm always able to get it with the mixer)
  2. Force unchilled dough through a cookie press onto an ungreased cookie sheet. 
  3. Decorate with decorative sugar or sprinkles.
  4. Bake at 375 degrees for 7-10 minutes until the edges are firm not brown, although if your oven is like mine, they're done at 7!!! Then transfer to a wire and let cool.


shhhhh, I just noticed the edges of this batch did get a little brown, LOL!! 

24 books for Advent, the kids LOVE it!

Days 1-4 have been a total success with giving the kids 24 books to Advent. Unfortunately  I can rarely get Joey to sit for a picture, so many of the pictures you'll see will be of Leah and Aiden, LOL!

Before we open up each book, we've been taking a minute to read  the reading associated with that particular day of Advent and then explain it to the kids. I'm so happy to make this an annual tradition for our family!!

Check out my post from last week: 24 Books For Advent


Wednesday, November 28, 2012

Salt Dough Christmas Ornaments


I had seen several pins on Pinterest on Salt Dough Ornaments. They looked super easy and like a lot of fun so I thought I would give them a try!

Ingredients
1 cup of salt
2 cups of flour
1 cup of water

Mix all 3 ingredients together until mixed very well until a dough is formed. Then use a rolling pin to roll out dough to your desired thickness. Then you can use cookie cutters to make the ornaments or you can use a knife or toothpick to cut out your desired shape you want.

*Depending on where you are making the ornaments, you might want to lay some wax paper down on the surface you're using. You'll want to sprinkle a little extra flour down before you start working with the dough otherwise it will stick. I also made sure some there was a little flour on my hands and rolling pin as well.

We made a few different types of ornaments:

For each of our children, I had them press their hands into the dough and made hand print ornaments for each of them. (which I still have yet to paint, LOL!)

I also made snowmen, I cut out circles then a little carrot nose. Then I painted it. I also added a coat of clear glitter paint to give it a little added shimmer.


If you would like, you can add a little food coloring to the dough as well, but a heads up, you might want to wear gloves! When I added red dye to make the Santa ornament, I ended up with red hands, LOL!!

The Santa took a while for me to make, I found the idea from The Glue Gun Girl. I rolled out each little piece of his beard by hand. It took a tad bit longer than I thought, LOL! After it was done in the oven, after I let him sit for a day or so, I sprayed a clear coat sealer on it.


I also made Christmas tree ornaments as well but still haven't painted those yet either, LOL!

I put a hair bobby pin into each of the ornaments to use so I could add an ornament hook to. Some people just poke a hole through their ornaments but I liked the idea of the bobby pin.

After all the ornaments were done, I put them in the oven at 200 degrees for 2 hours. After 2 hours still felt a little soft so I popped them back in a for a while longer. Then I left them out over night on the cookie sheet to air dry. The next day a few of them still felt a little damp so I popped them back in the oven the next day for another hour.


Recycled Light Bulb Ornaments

Again, another type of ornament I had seen examples of around on Pinterest but gave them my own little flare.

These little guys were so fun to make! I'm tickled to death to finally have something to use old light bulbs to make!! I love up-cycling things from around the house!!

To use as a hanger for both of the bulbs, I used brown twine and tied it around the top of the ornament then tied the two ends together in cute bows.

For the Snowman Light Bulb, I painted the bulb white, sprinkled white glitter all over it, waited for that to dry. Then I did a few coats of the homemade modge podge I made the other day. I found super cute black rhinestone stickers at the craft store for the eyes, mouth & buttons. For the nose, I used orange puffy paint.


For the Penguin Light Bulb, I did the first coat of paint in white, then used a pencil to outline the area I wanted to keep white then painted the rest of it black. After both coats dried, then I added a coat of clear glitter paint all over the bulb. After that dried then I used blue puffy paint for the eyes and orange again for the nose.


10 Free Holiday Cards from Ink Garden!

For the past two years I've gotten photo Christmas cards for almost nothing! I LOVE saving money especially on things like this! In the past, I always used regular Christmas cards I would buy at the store simply because I didn't want to pay the extra money on cute photo Christmas cards (as much as I wanted to, LOL!). Now thanks to all the deals I've found on photo cards, it's actually been cheaper for me to buy them than the old school Christmas cards!!

When I saw this one this morning, I couldn't help but share! Ink Garden is offering 10 free prints plus 40% off your order if you're a first time customer (you will need to pay for shipping)!!


Ink Garden

Tuesday, November 27, 2012

24 Days of Books for Advent

I really wanted to find an extra special way to celebrate Advent this year. A few of my friends told me how they give their children 24 books, one each day of Advent, I couldn't help but think what a wonderful idea that was! I've been wanting to add to our bookshelves, so I had to jump at the chance.

I decided rather than just wrapping the books and giving them to the kids, I would go a step further. I went online and found popular daily readings from during Advent. I did one for each day THEN I went one step further and searched Google Images for pictures for each of the readings. Believe me, this took A LOT of time but it's going to be so worth it. Not only to give the kids a new book each day but also to read the reading from the Bible and explain Mary & Joseph's journey leading up to the day Christ was born.


Since I want to make this a yearly tradition, I cut each day's page down to a good size then laminated each page. I bought this laminator on Amazon last year, which has been so handy for many projects, LOL!

If anyone is interested, I made the daily readings into a Google Doc to share with anyone that would like to use it. You can access it here.


.